What is this: Christmas in August? Well it seems that Im getting orders for my Christmas Reindeer and Sleigh Wood plans and I mean Im getting alot of orders. Im not sure what it is? Well it maybe its the 33% Off SALE.
Christmas Reindeer Sleigh Woodworking Plans Our Reindeer Sleigh is very easy to make from our Full Size Templates... Simply trace the Full Size Templates onto your wood and then cut out and paint... Its that simple! This Reindeer Sleigh is designed to go with the Large Christmas Reindeer Plans #6901. Christmas Reindeer Sleigh measures: (19" High x 28" Long x 21" Wide). For more information go to http://www.gcwoodworks.com/christmas_reindeer_sleigh_woodworking_plans.htm
For more Award Winning Woodworking Plans go to our Website Gold Country Woodworks at www.gcwoodworks.com and check out our Wood Plans and Wood Projects.
I managed to hit an estate sale last Friday and picked up a handful of tools. Someone in the family was a hobbyist woodworker - the largest piece of equipment was an older Shopsmith with a full compliment of accessories (bandsaw, etc) - there was also a European bench that was already long gone when I hit the sale (probably a good thing as I wouldnt have room for it anyway and they tend to be very pricey).
Most of the prices were reasonable to high (as usual) - I passed on a later model Disston handsaw at $10 and a few other tools, but did manage to pick up a set of Footprint cabinet maker screwdrivers - these are the flat haft type with oblate handles in beech. I also found a #15 SnapOn Phillips driver, a "Sears" marked grinding wheel dresser (appears unused), a rosewood handled putty knife (partial to those) and a Sargent hole punch (second of this type Ive found). Most items were in the $1-2 range with $25 on the screwdriver set. Nothing real special here but all good user tools.
?
Footprint Bench Screwdriver Set
?
Made in England
??
Snap-on SSDP102
???
Sears Grinding Wheel Dresser
??
Super Hyde Putty Knife
??
Sargent Hole Punch
?
Not too bad for a brief stop. In particular Ive been thinking about a set of cabinet drivers so those are very welcome.
Every year the GWA attends and displays at "The Woodworking Shows" and this year was no exception. For 2013 the show moved to the Gwinnett Center in Duluth, Georgia (formerly it was at the North Atlanta Trade Center). Im not quite sure why but there seemed to be a heightened sense of excitement this year. I also got to attend a seminar by Paul Sellers (someone who Ive found quite interesting online - hes just as gracious and charming in person as he is in his popular videos).
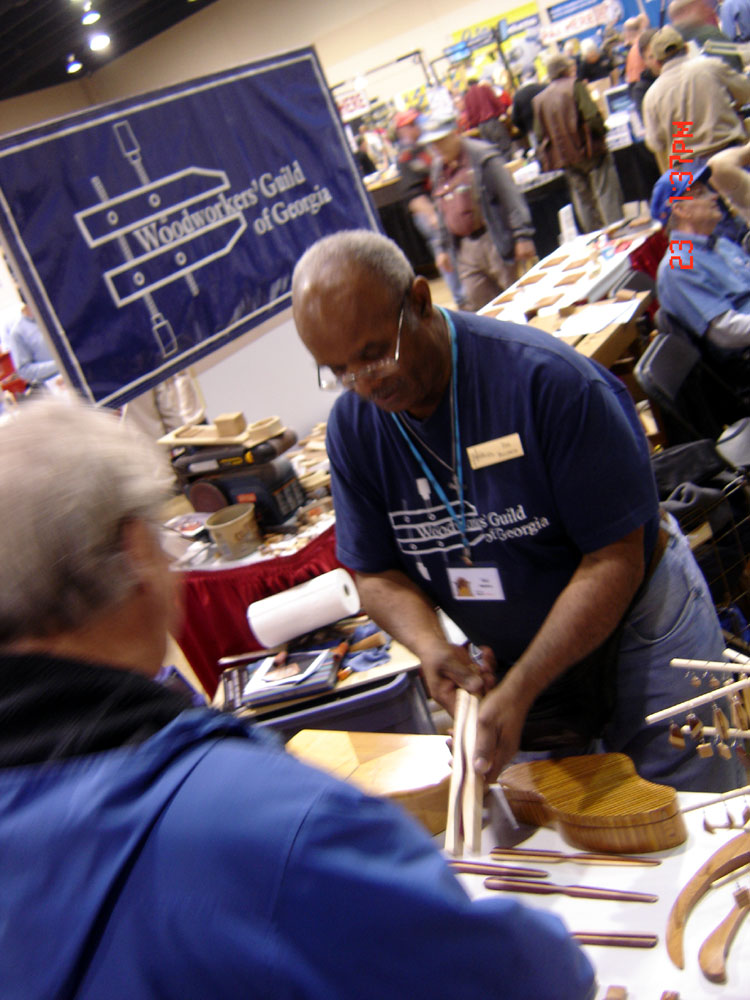
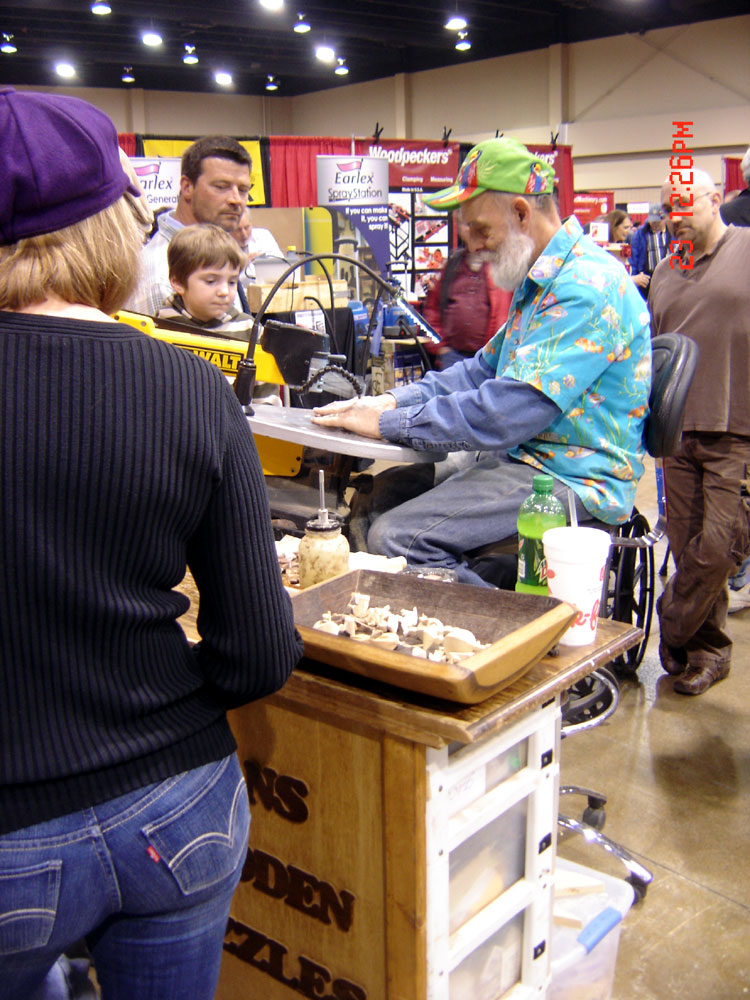
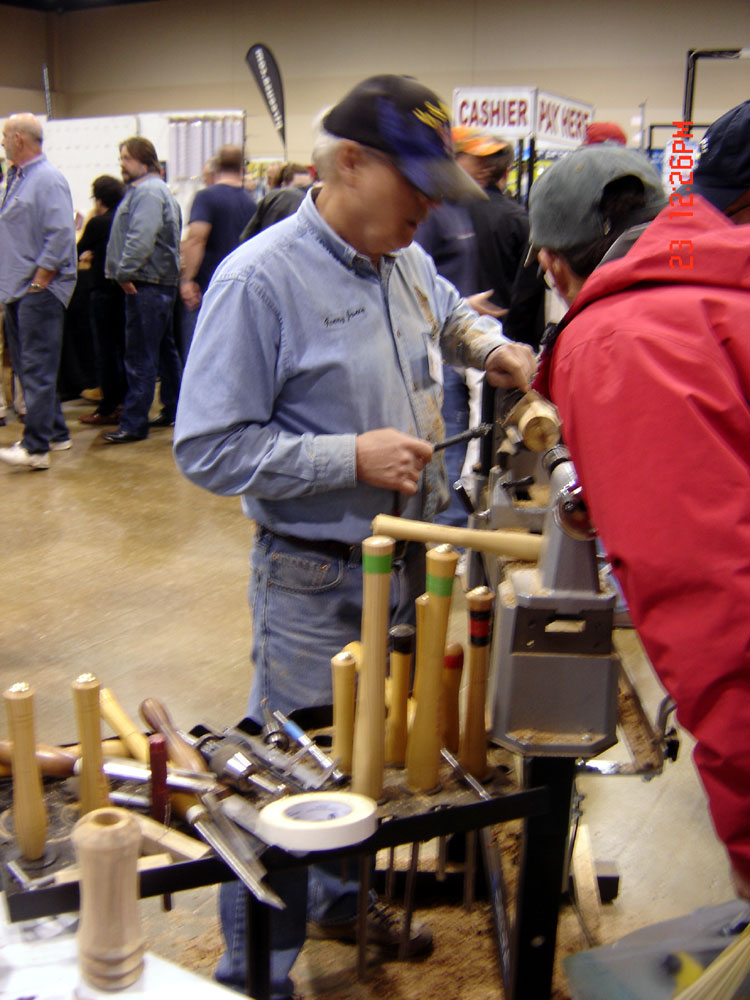
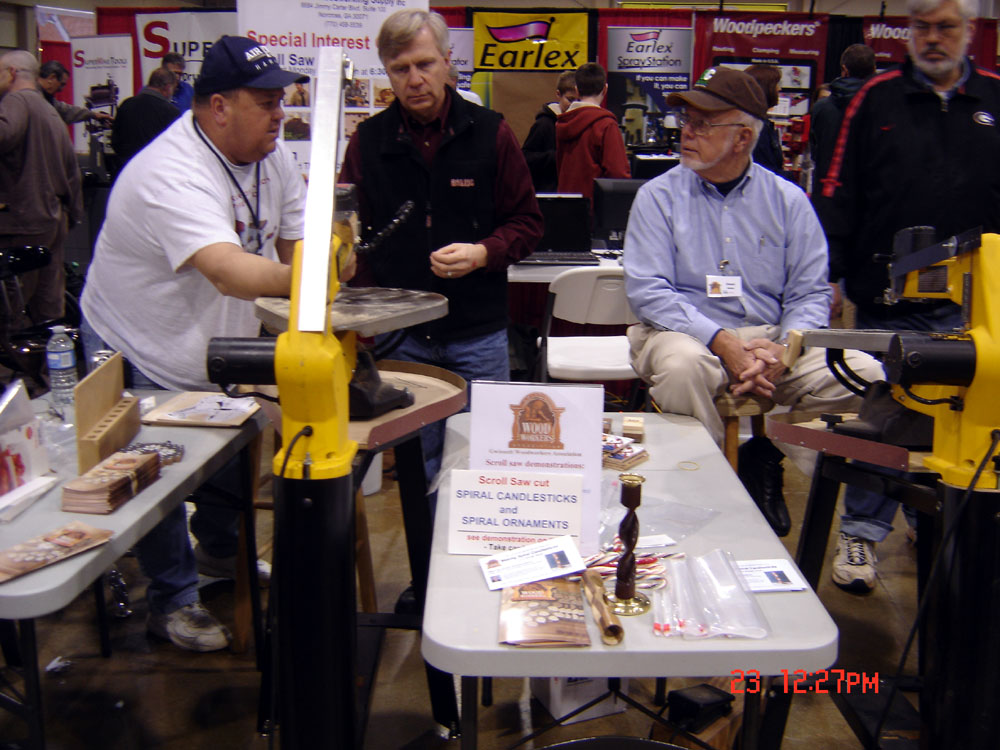
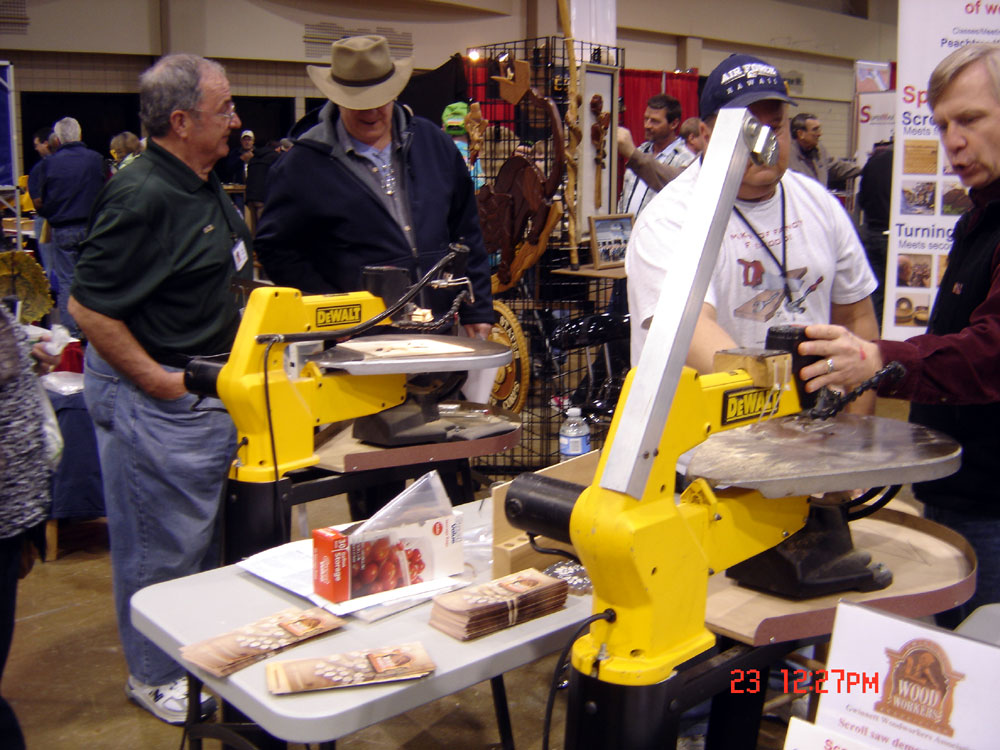
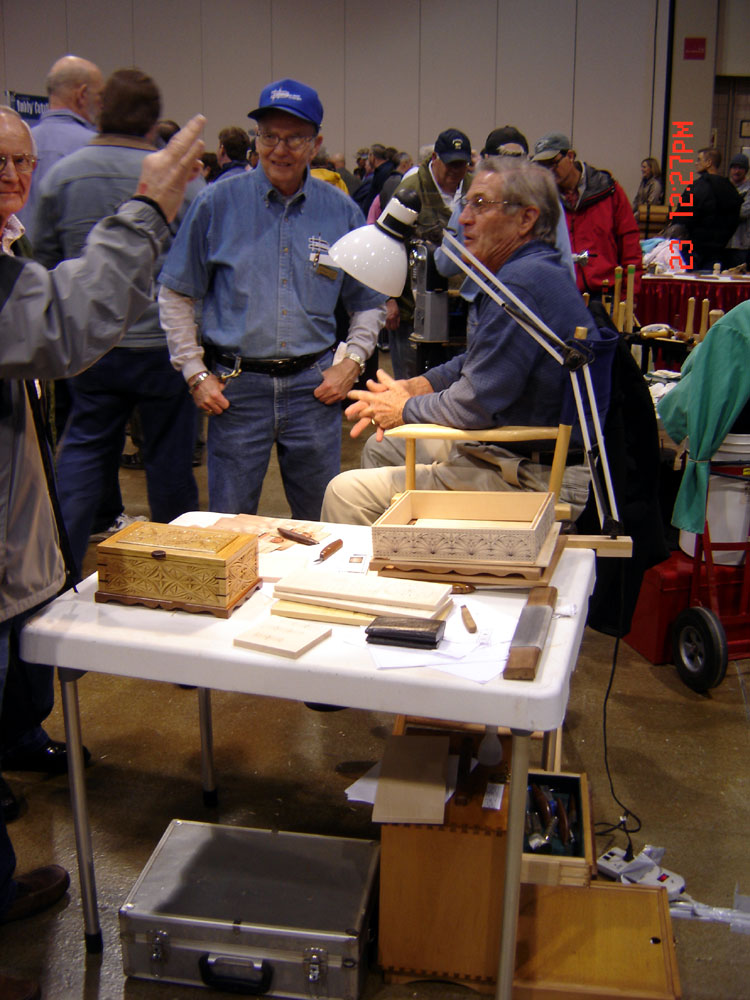
The GWA booth was near the center of the large room down the main entrance. We had many items on display and also had stations for lathe and scroll saw work with volunteers in attendance. For the first time Ricky Alexander and some others set up notebook computers and demonstrated the work the SketchUp SIG has been getting into. Weve found that doing these shows is a great way to meet new people, discuss new methods and garner potential members. Here are the photos I took at the show.
GWA Member Ted Baldwin doing a demonstration at the Woodworkers Guild Booth...
Ted Baldwin at the Woodworkers Guild Booth
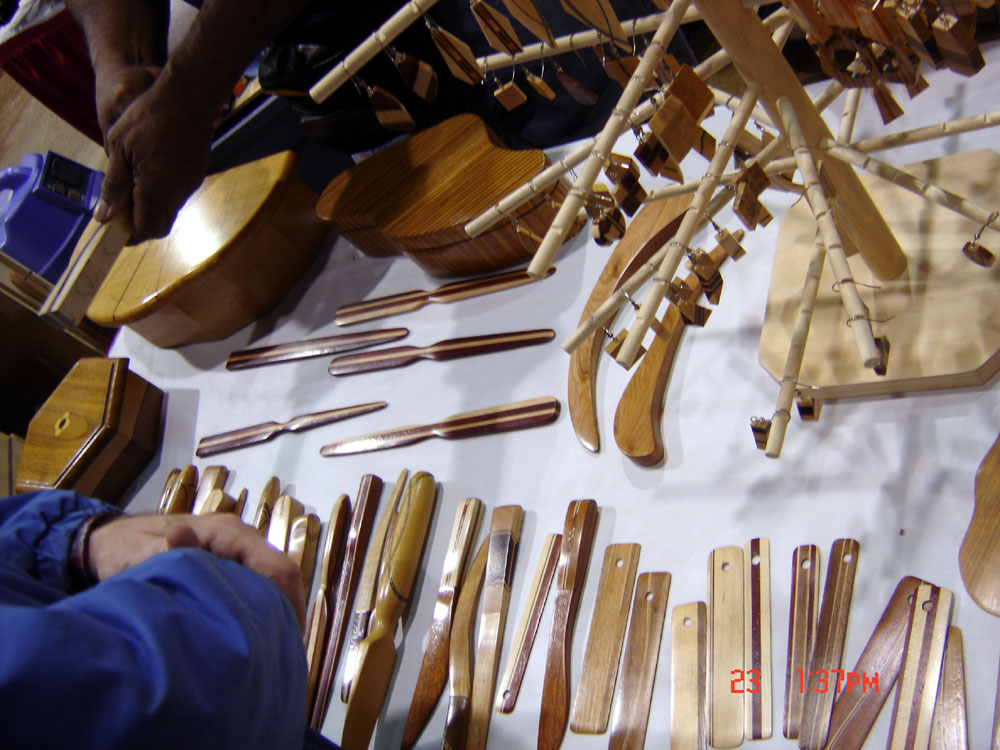
Some of Ted Baldwins Work
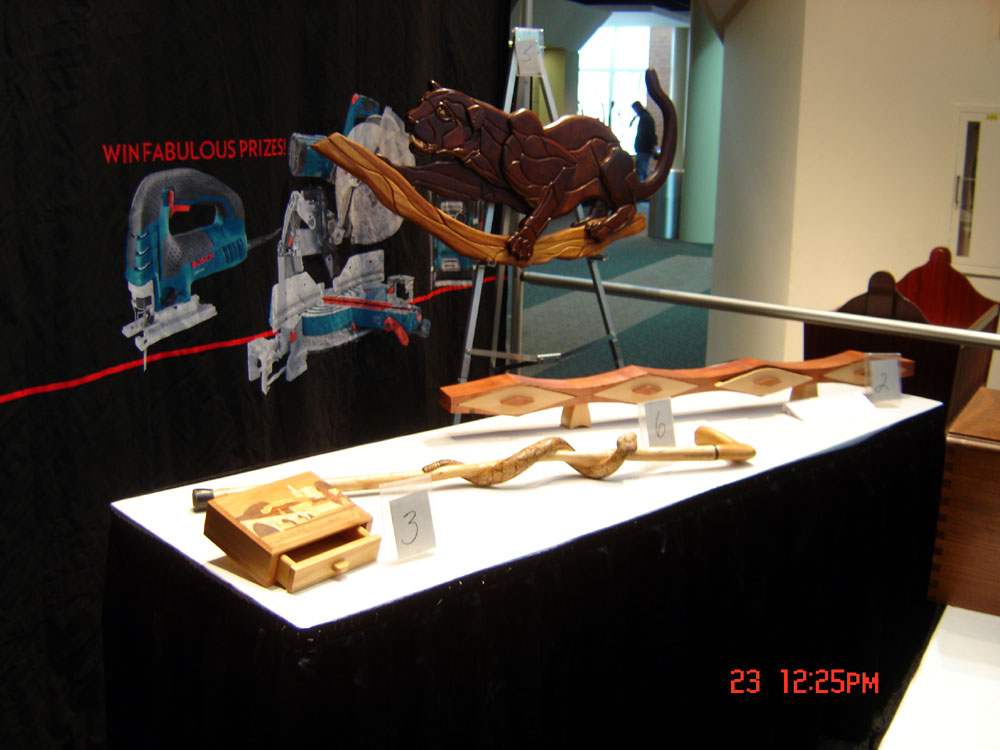
In the main lobby area was this table for the "Show Off Showcase" - not many entries this year...
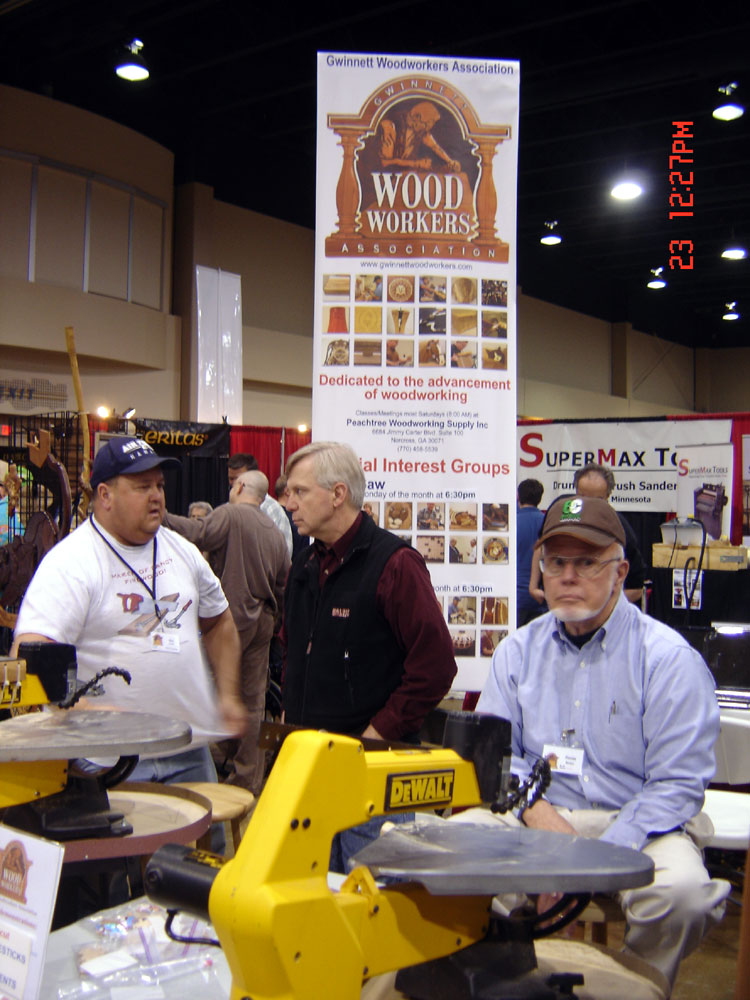
New signage at the GWA booth this year - normally were against the wall so this year we chose to do tall vertical banners...
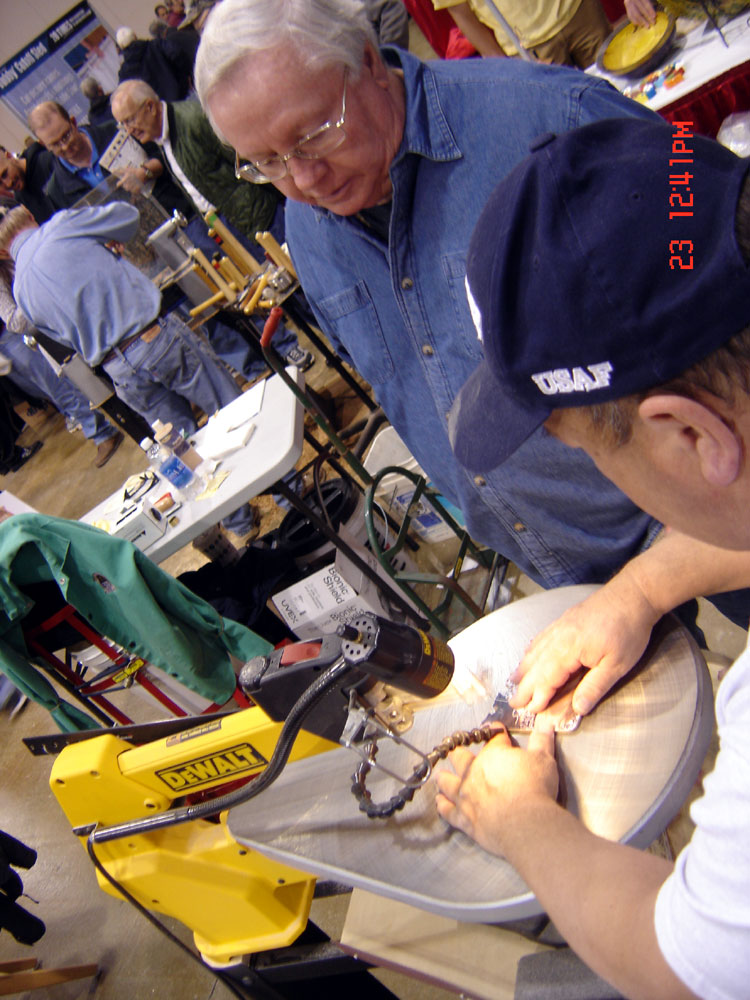
Hans Meier at a scroll saw station...
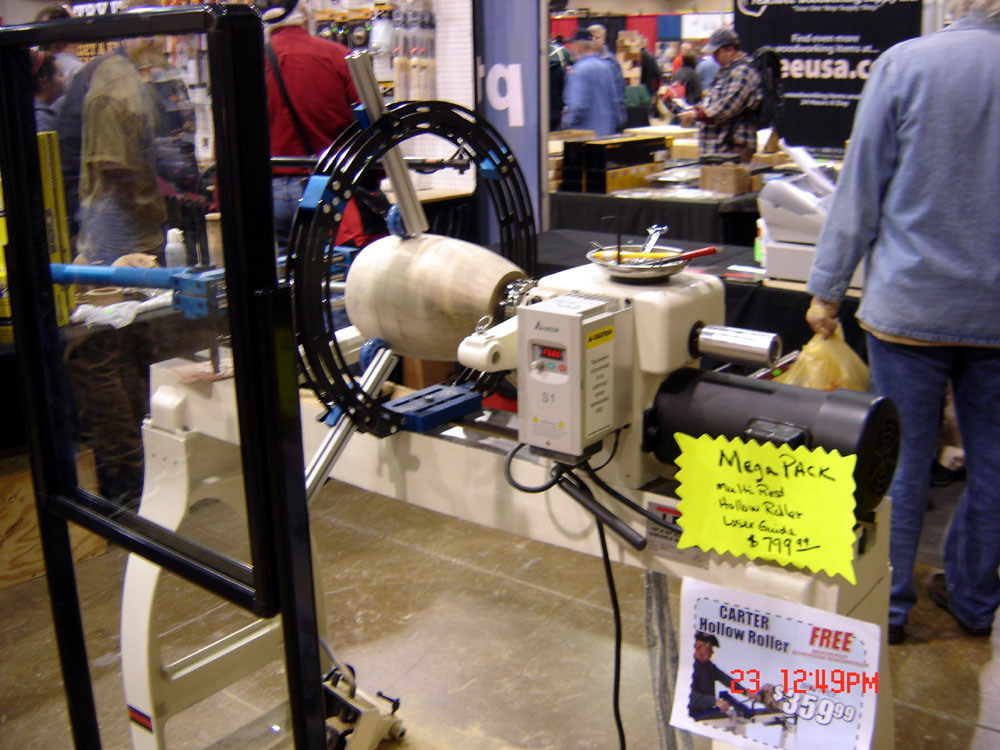
Gerry Jones at a lathe....
A shot of one of the new banners...
Mickey Hudspeth demonstrates his skill at chip carving...
Steve Carmichaels fantastic "Kiss" weathervane...
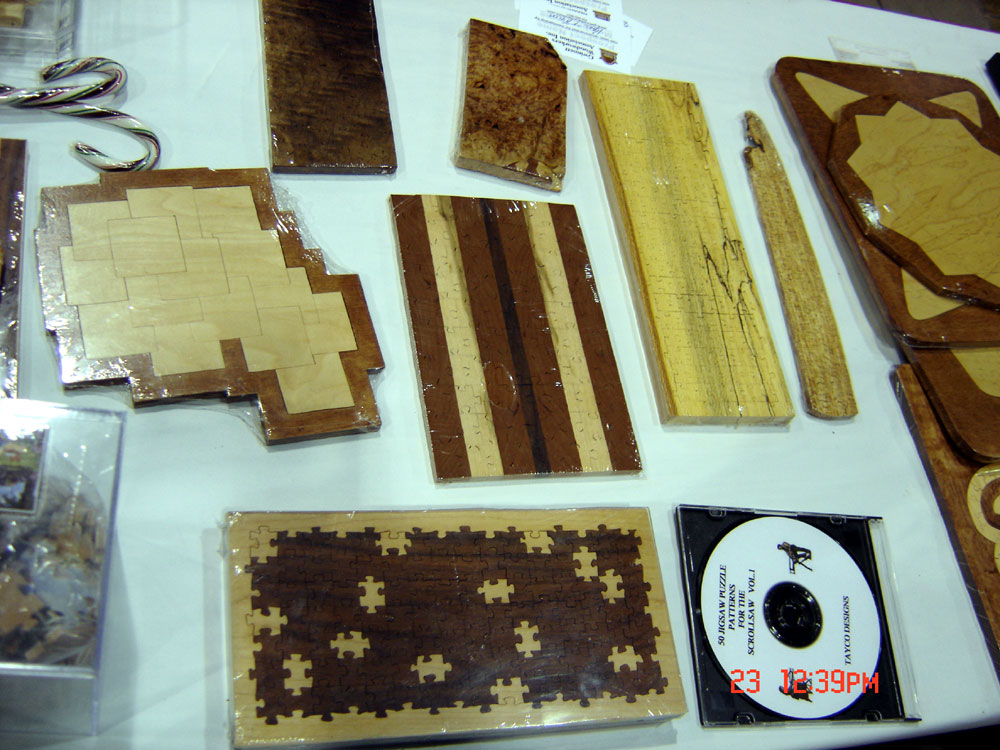
Some puzzles by Karl Taylor...
Some of George Norths segmentation work if Im not mistaken...
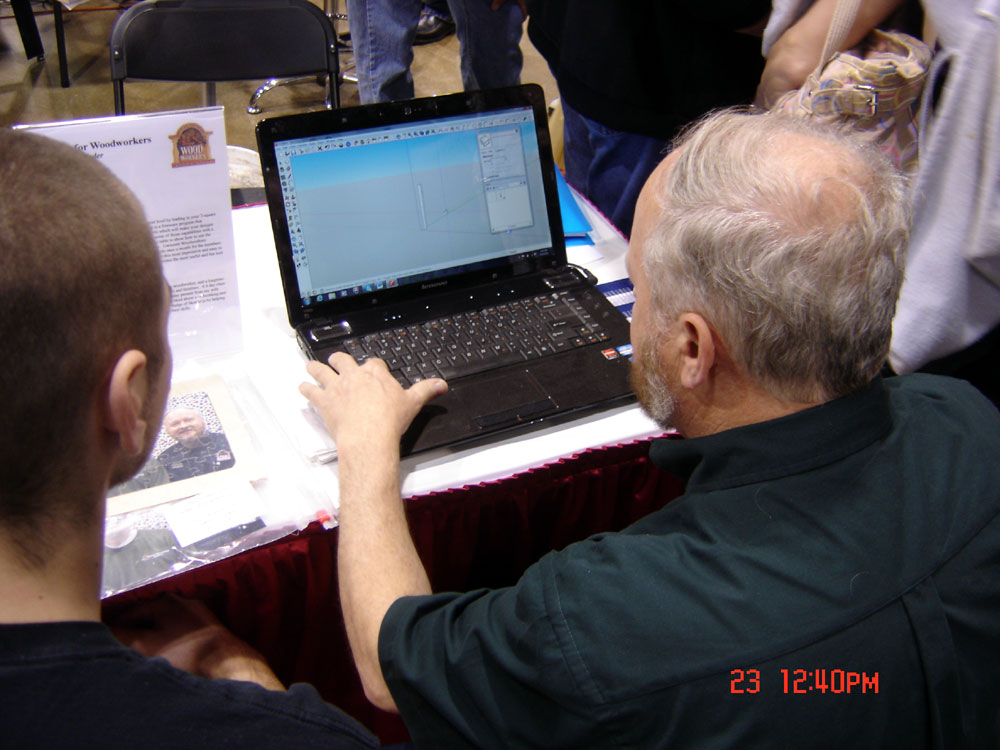
Ricky Alexander doing magic in SketchUp...
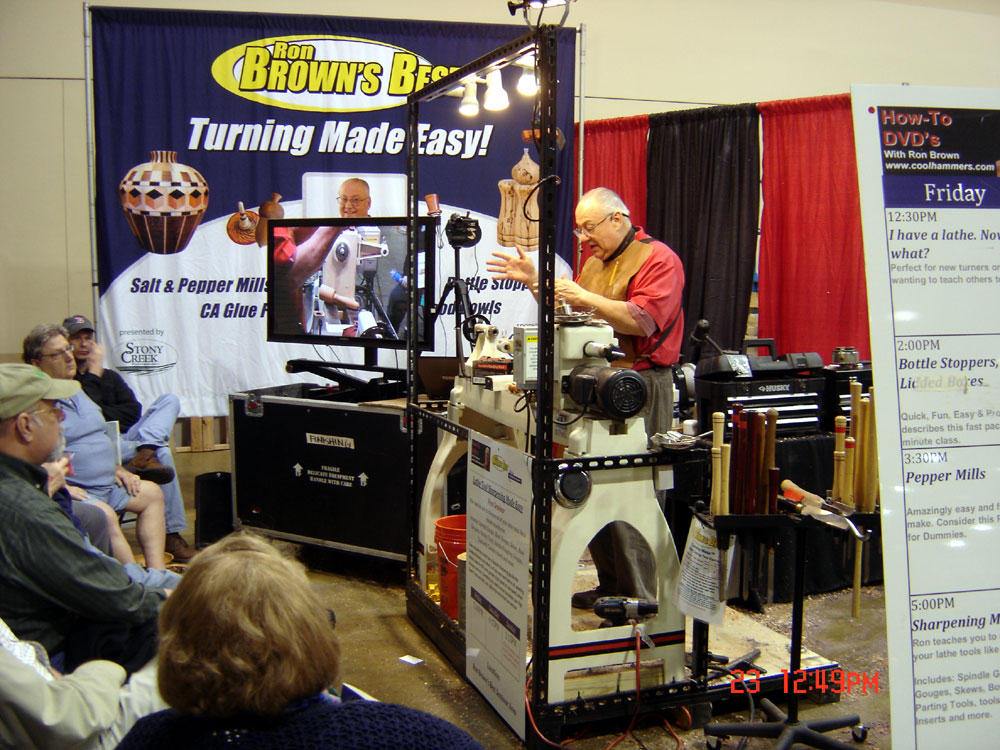
GWA founder Ron Brown had his own booth this year...
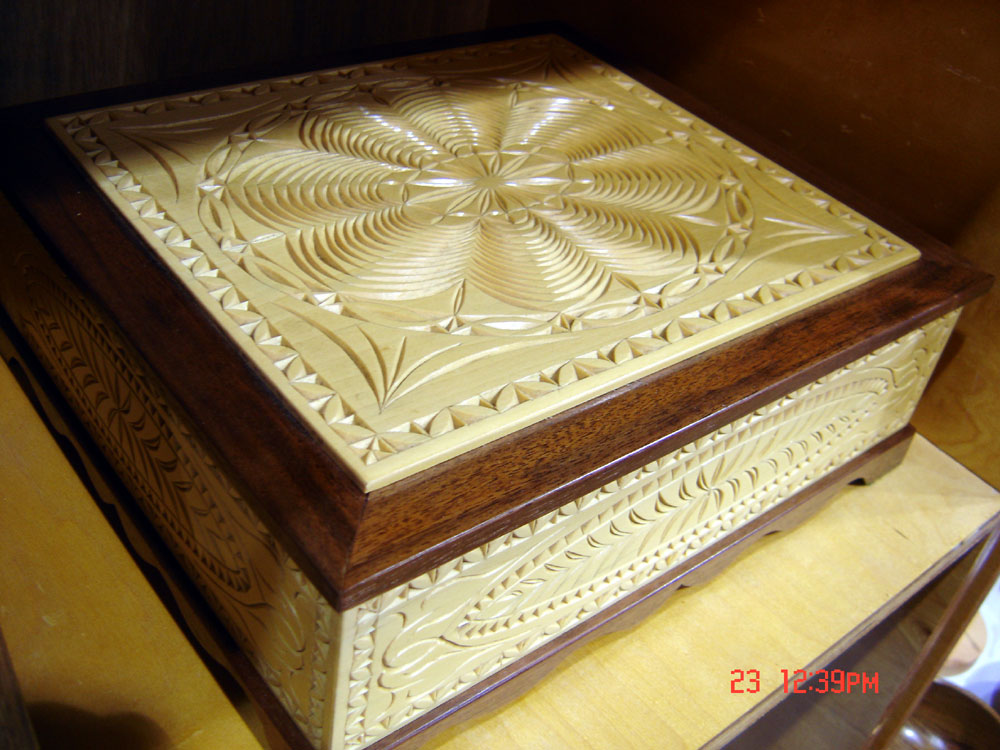
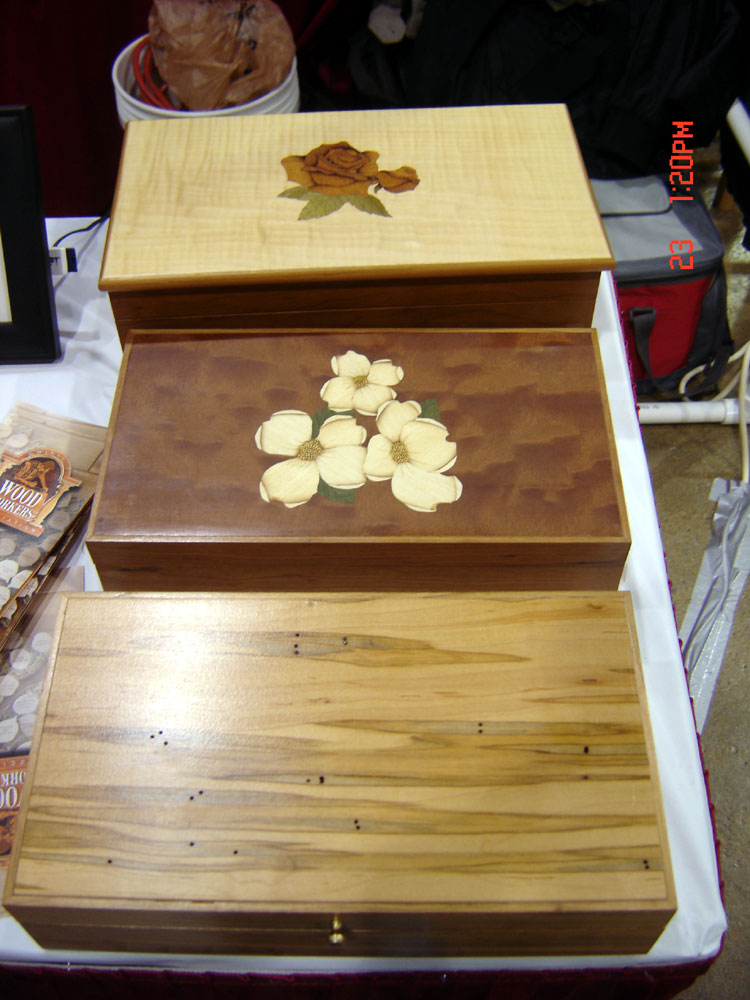
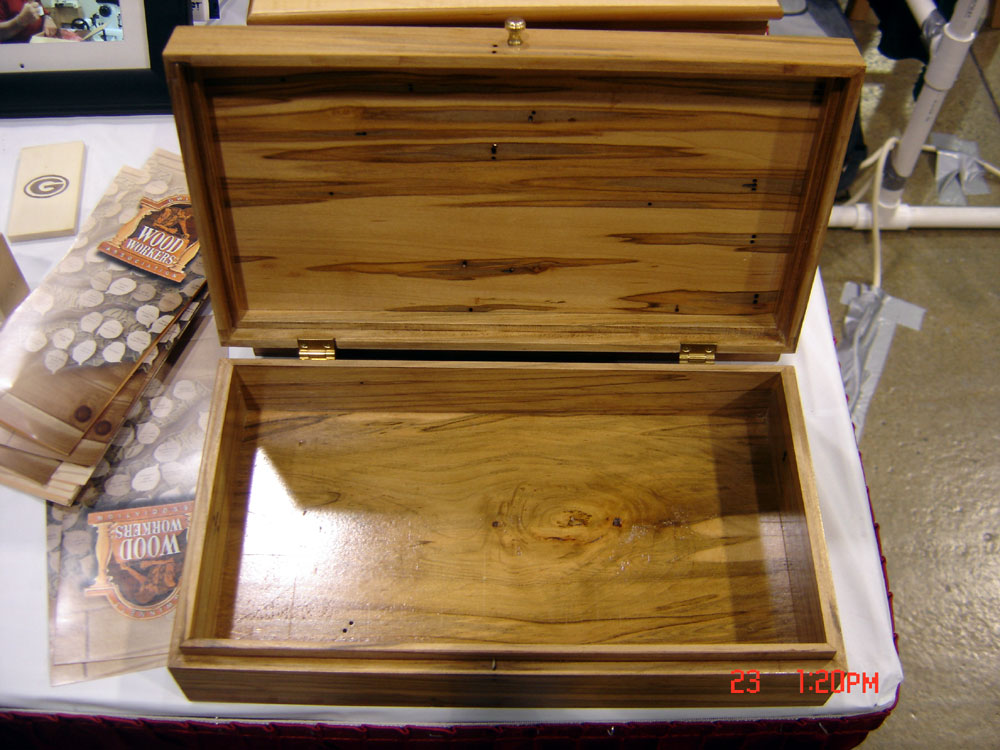
Some beautiful club-made boxes (Rob Brokaw I believe, featuring a bit of marquetry)...
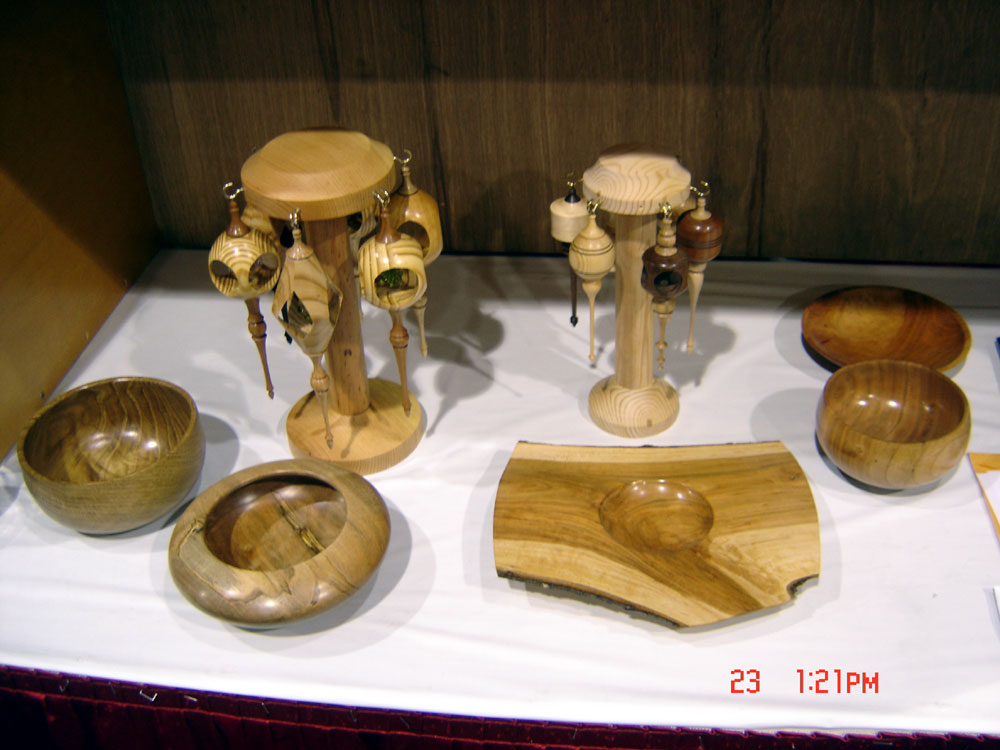
Some turned items by the Turners SIG...
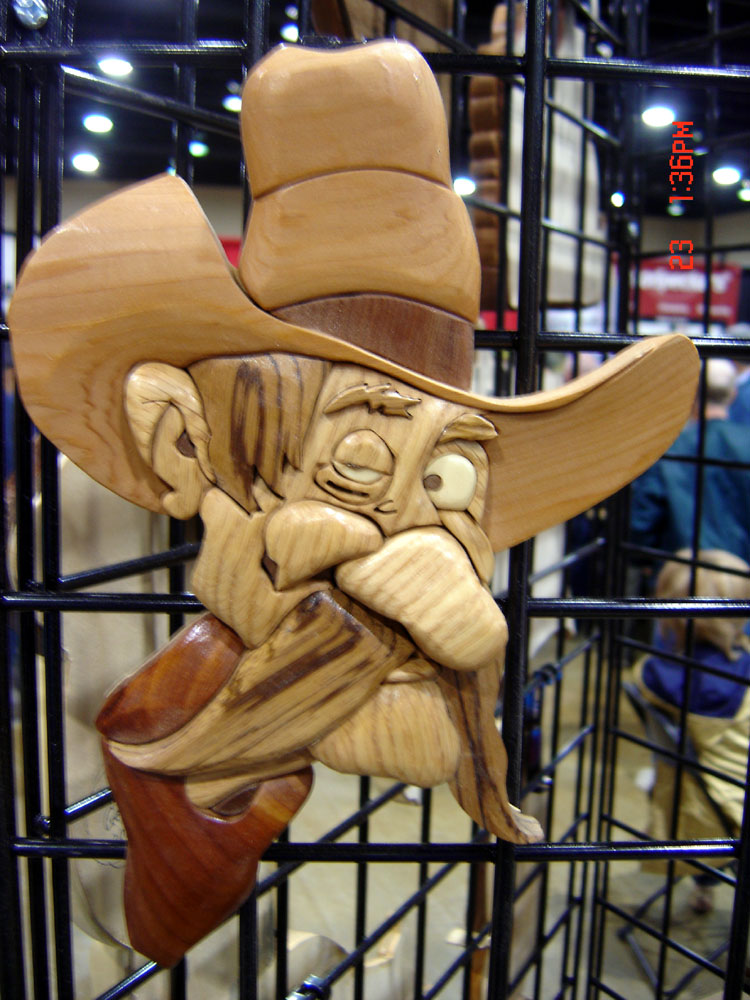
A whimsical intarsia piece...
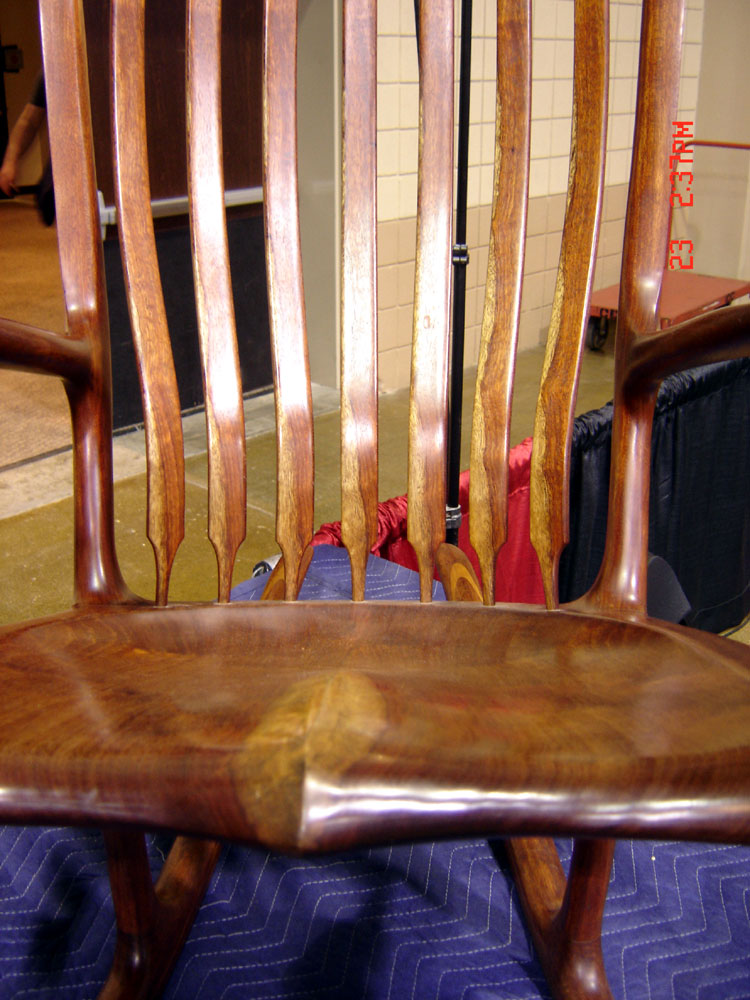
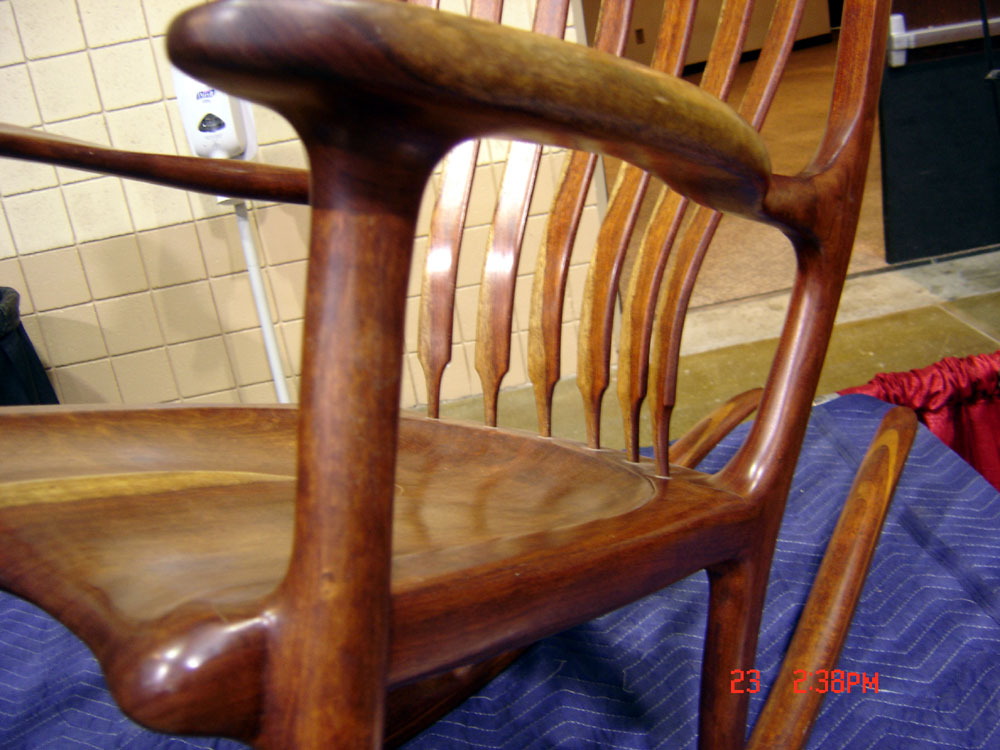
I spotted this chair in another booth and had to take a couple of stills...
What is meaning Make scrap recycled wood in phoenix you have found it on my blog In the survey I get that not a few people who need a pdf version for Make scrap recycled wood in phoenix check this article
illustration Make scrap recycled wood in phoenix
Basically all you need is wood reclaimed wood can be easily bought or
How To: Make a DIY Scrap Wood Bathtub Caddy from "Recycled Home"
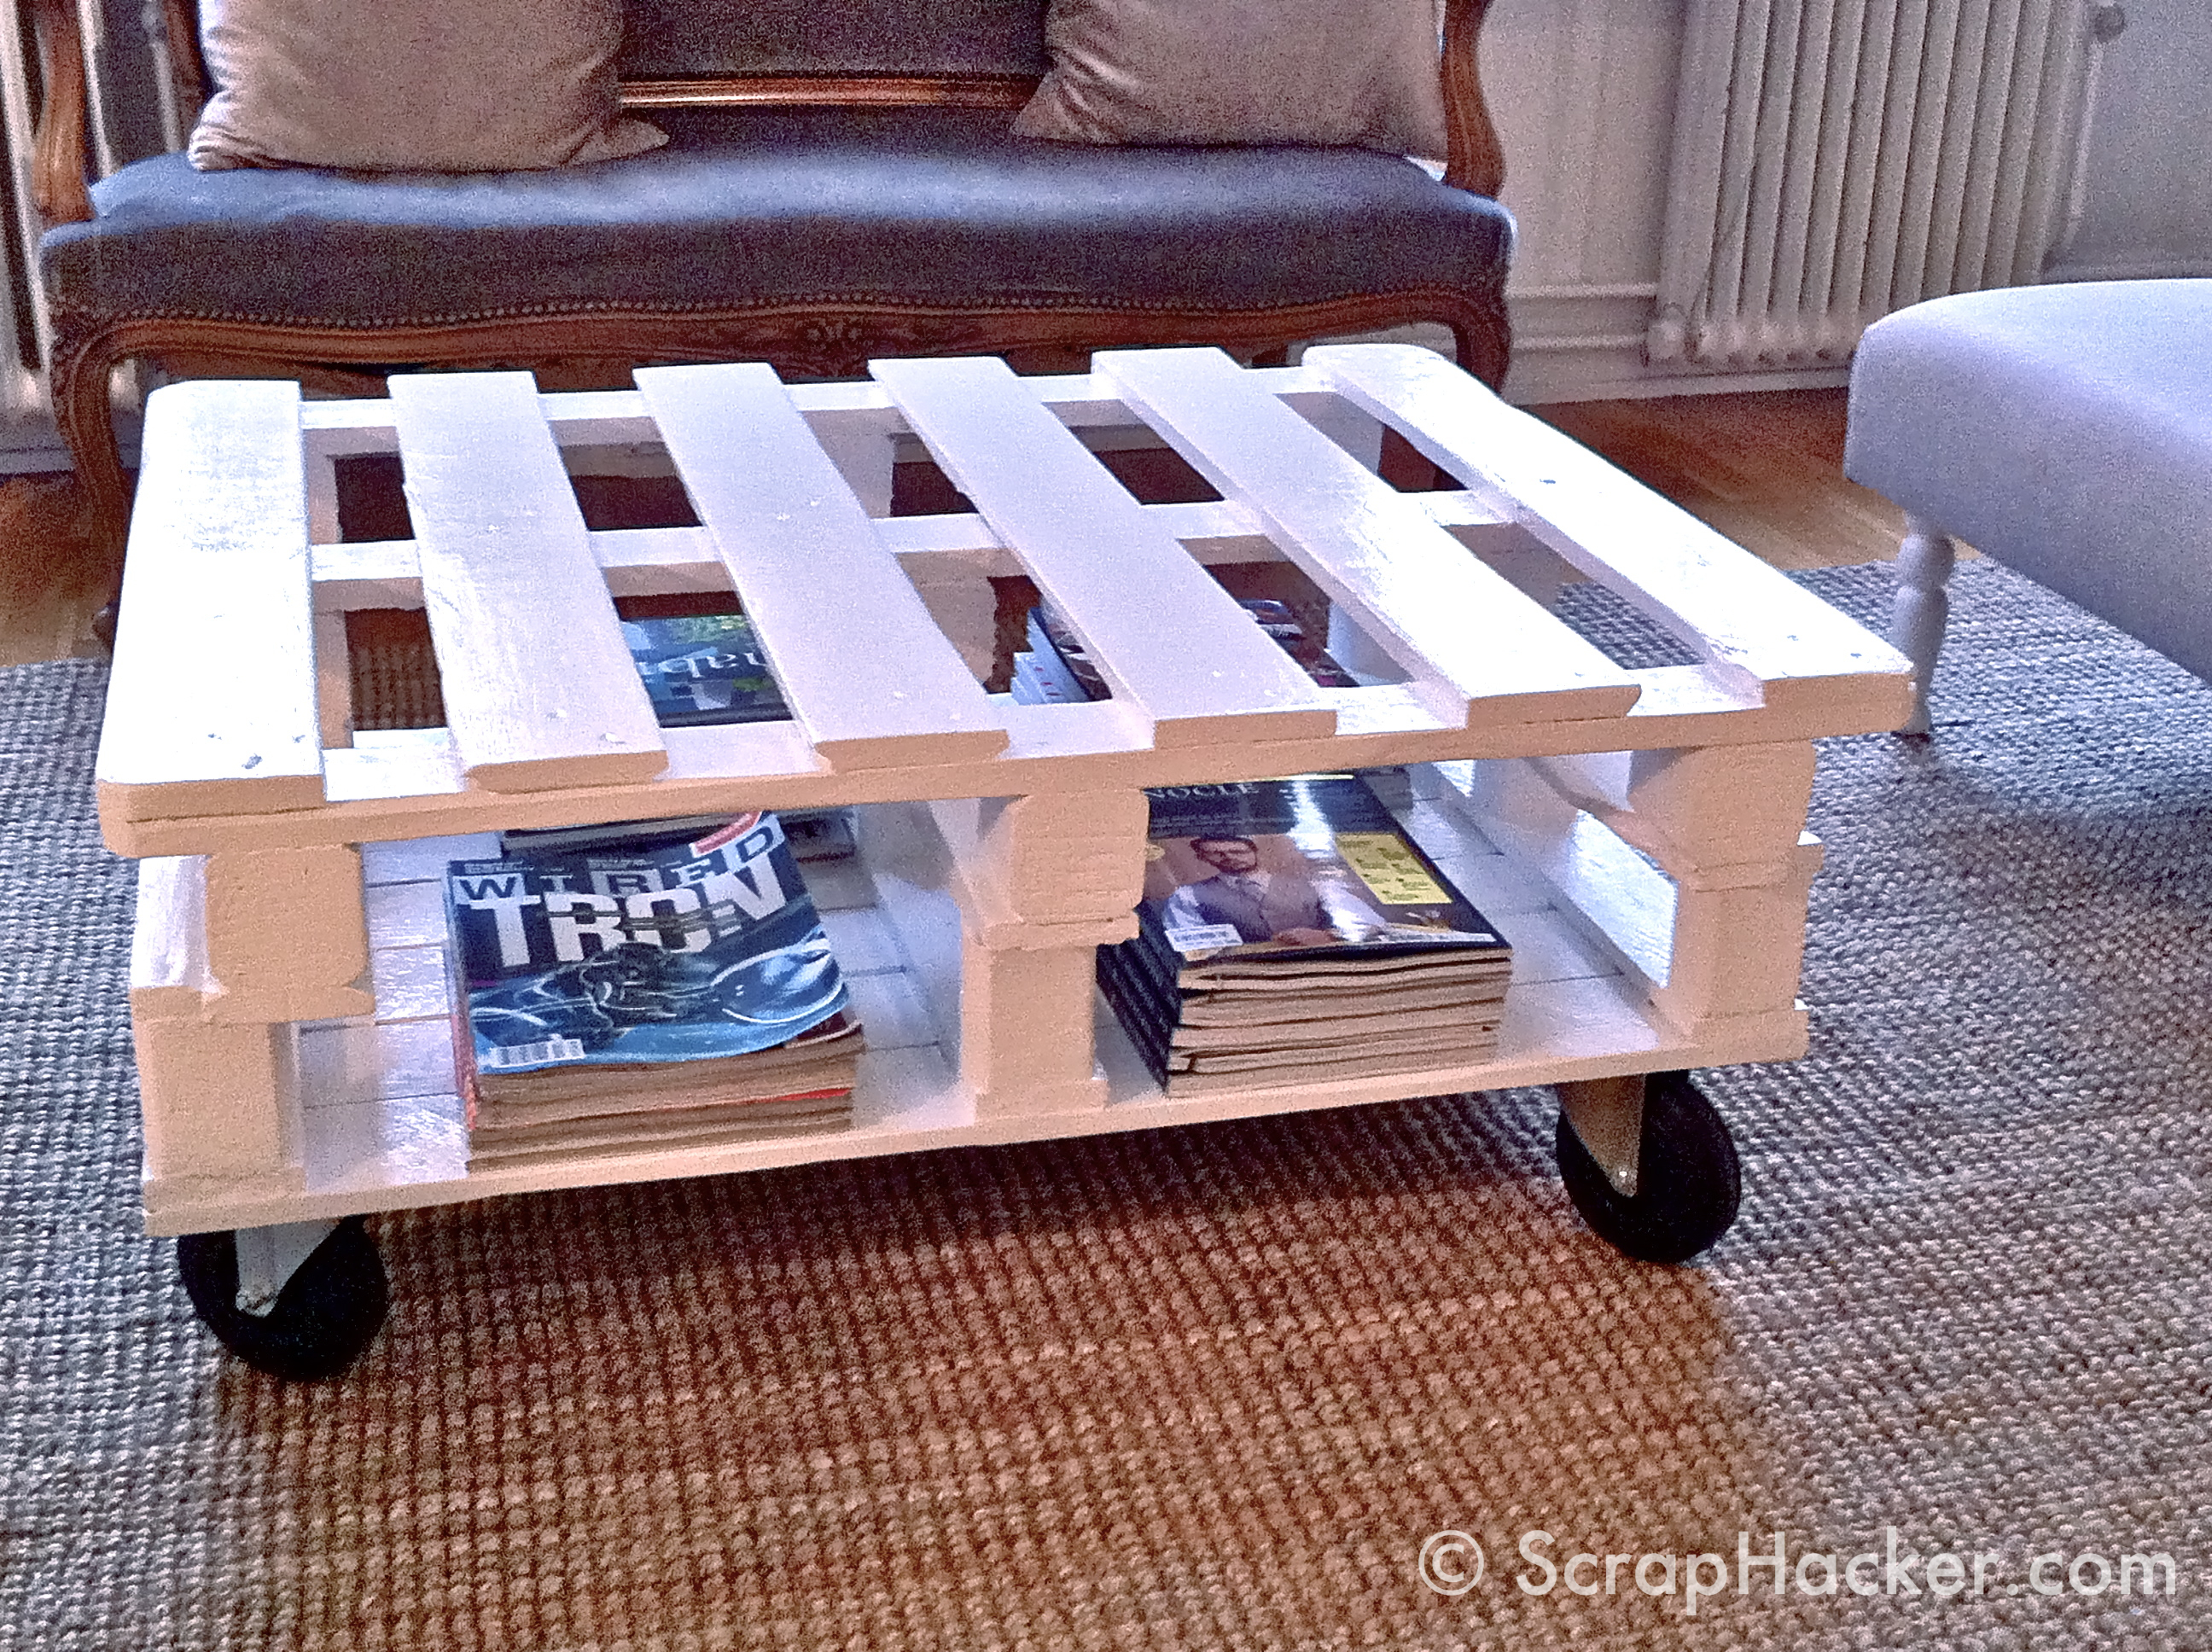
Pallet Coffee Table – A 7-step Tutorial
Juice can or oatmeal canister to use as pattern tracer
Rolling outdoor table.
understand Make scrap recycled wood in phoenix who much girl seek individual happen lucky because uncover Make scrap recycled wood in phoenix
Well this Make scrap recycled wood in phoenix post Make you know more even if you are a beginner in this field
Shop Description: I’ve been a woodworker for years (my dad has a nice shop), but recently decided to set up a shop of my own in my 12 x 24 garage, which I’m sharing with yard tools, bikes, and camping gear. So far I have a table saw and a planer, a few smaller hand-held power tools, and a few hand tools–it’s a good start (and there’s not a lot of space for much more). I like the window next to the workbench, and even though there’s no heat or A/C, I love to be in there.
Woodworking Projects Made Easy With Woodworking Plans How To Use Woodworking Plans For Your Next Woodwork Project
Have you finished any DIY woodworking projects before? If youve done it youre aware of the fact that a good construction requires some really good planning. If this is your first try its important to make sure that youve got a plan before you start.
It doesnt have to be difficult to come up with a plan for the project youre considering to start with and the project will much more likely become as you want it to be if you take yourself time to plan everything carefully before you start using your tools.
One easy way to find a good plan for your woodworking project is to look online. The net is full of interesting woodworking plans for DIY projects and you will be amazed by how easy it is to find one that seems to be suitable for you. You will in most cases be able to choose between hundreds, or even thousands of woodworking plans and most of them are really good and easy to follow.
When youve decided what plan you would like to use its time to take a closer look at it. You might need to search a little on the net in order to learn more about woodworking before youre ready to start. Its important that you have some knowledge on the topic before you start building something yourself, its more difficult than you might think and its easy to get hurt unless youre careful.
If youve read plenty about DIY woodworking projects on the net but would like to get some answers to things that you think is difficult to understand its wise to register for a member account on a forum regarding woodworking. You will soon discover that there are several forums to choose between and other members will be able to help you get an answer to every question you might have.
The most important thing when youre into woodworking is the safety. You always need to be aware of the fact that you can get hurt if youre not careful. This is important to keep in mind even if youve completed many woodworking projects before. Its actually easier for experienced constructors to get hurt since they are usually more careless than beginners.
As you can see you need to do three things to start with. Find a good woodworking plan, learn as much as you can about woodworking and be as careful as you can when you start working with the project.
When I built the Federal-style desk that featured in Peter Gedrys article "Antique Finish that Holds Nothing Back" I knew that it would not just sit in a room looking pretty but be used everyday by my wife in her home office. On her previous desk the slide-out tray featured a padded wrist support in front of the keyboard. The purpose was to prevent carpal tunnel syndrome developing in the wrists, a painful malady that can only be healed through surgery. I was determined to add such a support to the new desk but I wanted it to be as unobtrusive as possible. This is how I built it:
1) Take measurements of the existing pad or the keyboard and construct a wooden core. Round over the top corners, and cut 1/8-in. deep rabbets on the the underside.
2) Wrap two layers of closed-cell foam around the core and staple them inside each rabbet. Sources of foam include packing materials or you can buy sill seal used in home building.
3) Cover the foam in either leather, if youre feeling extravagant, or in my case leather-look vinyl. Either can be bought at fabric shops.
4) Fold over the vinyl at each end, cut away surplus fabric, and staple the ends down.
5) Screw on end caps with recessed screw holes and plug the holes.
6) Dye the plugs to match the end caps. I used a non-grain raising dye but even a permanent marker would work.
7) Attach the pad using screws from the underside of the tray. Start typing.
Michael Thompsons wooden bike has no chain but uses a series of gears to transmit energy from the pedals to the rear wheel. Photo: Courtesy splinterbike And now folks, a first in the annals of personal transportation and an inspiration to mechanically minded woodworkers everywhere. British woodworker Michael Thompson has constructed the first of its kind, all wooden bicycle. Weighing in at 71 pounds, the ingenious two-wheeler is made primarily of birch plywood. Thompson used lignum vitae for the bearings and bushings and a bit old broomstick for part of the handlebar assembly. There is no metal or rubber in it, and no playing cards in the spokes, either. Thompson built the bicycle to satisfy a bet with a friend, but the pair are seriously hoping to set a speed record (for wooden bikes) once the cycle is up and running. Will it be fair to say the cycle is "lumbering" up the track? Thompson said it took about 1,000 hours to design and build the bike. For more photos and a video, check out the splinter bike web page. posted in: blogs document.write();document.write(); FineWoodworking.com editors report from the woodworking front lines. Check in every weekday for news, information, projects, and answers to questions from Fine Woodworking readers everywhere. Learn about our new format! Archive: Temporarily unavailable. Stay tuned and sorry for the inconvenience.
Interior Designer Kara Angotti weaves video blogging into her daily design practice
Photo: http://www.youtube.com/watch?v=MXEReADq5Os&feature=related Recently Kara Angotti of KO Angotti, a woman-owned interior design and energy audit firm located in Philadelphia, ventured out of the city to visit my wood shop, Superior Woodcraft in Bucks County, PA. To share the information with her design community Kara wrote a blog post and created a YouTube video. Now it’s not every day that I have an interior designer/energy auditor/blogger come for a visit; so this had me thinking about how Kara’s social media work is completely integrated into her interior design and energy audit business. I sought to learn more about the ways in which Kara balances her actual work with her social media marketing endeavors, and heres what I learned: PK: Kara, why did you start to create social media for your business? KO: Social media marketing is a low monetary cost high impact way to reach an interested audience,which is very useful when you’re not exactly a Fortune 500 company. Do you have specialized training in this area? No, I have no specialized training, but we leverage experienced consultants for effective marketing techniques. Social media marketing is still fairly underdeveloped and is rapidly evolving; therefore it’s difficult as a business owner to maintain focus on your core service while remaining current with the latest social media marketing methods. I suggest finding a young eager marketing professional to help guide you. I like what you said about underdeveloped and rapidly evolving. To me this means you can experiment and see what works. You don’t have to spend a lot of time worrying about making mistakes. Everyone is learning about what works in social media. Is it difficult to create a blog and videos? It’s fairly easy to get started with a blog thanks to the many available platforms (Wordpress, Blogger, etc.) and templates that exist. Videos are a bit more challenging since they require filming equipment and editing software. I recommend beginning with a blog and establishing it as the focal point of your online social media marketing campaign. Become comfortable blogging and expand from that point. How has it helped your actual interior design and energy audit business? Social media marketing has given us a promotional outlet that in years passed could have only been achieved through large scale and costly advertising campaigns. It’s also provided a branding opportunity, showcase for our designs, and platform to communicate developments in the auditing industry. What benefits could a small woodworking shop gain from creating a virtual community or social media content? Few media outlets offer a woodworker the opportunity to broadly display their craft. A blog would give your clients the chance to observe your progress and review your portfolio. What small piece of advice do you have for a woodworker who is thinking about creating a blog or shooting videos? I recommend beginning with a blog because of the low cost of entry. Bear in mind that consistency and the quality of your content is imperative to maintain a successful and respected blow. Thanks to all of our readers for dropping in on the conversation between CustomMade.com member Patrick Kennedy of Superior Woodcraft, Inc. and Kara Angotti of KO Angotti. Are you using social media for your business? What results have you witnessed?
? Or just want some advice on how to market your business and make it stand out in the marketplace? Well this blog’s for you.
A joint venture between Fine Woodworking and CustomMade, The Pro Shop will give you tips on selling custom furniture or just getting started in the business.
Questions for our bloggers? Post a comment here and we’ll try to address it in an upcoming post.
About Fine Woodworking: Your source for expert advice on woodworking and furniture making since 1975.
About CustomMade: An online marketplace designed to help serious craftspeople sell their wares and help customers locate a custom maker.
A week or so ago I was chatting with a new SketchUp user. He was asking if he could control the perspective in his views of his model. As it turns out there is a lot of freedom to control the SketchUps camera. In the Camera menu you can choose from Parallel Projection, Perspective or Two-Point Perspective.
Typically the default camera setting is Perspective. As you can see in the image above, the horizontal lines, although parallel in reality, appear to converge toward vanishingpoints on the horizon. Things at greated distance will appear smaller. Although it doesnt show in this view, the vertical lines also converge toward a third vanishing point. If the cameras point of view is from above the horizon the vanishing point will be below the horizon. this can make the model look smaller at the bototm than at the top. This image was created with the camera set to 28mm focal length to bring both vanishing points within the drawing window.
The default setting for the camera in Perspective view is 35°. The perspective effect from the converging lines is fairly obvious here. You can even see that the vertical lines appear to converge.
With the camera set to 28mm, the perspective effect is quite strong.
At 85mm, the perspective effect is subdued but its still there. This is actually a pretty nice view for furniture pieces.
A focal length setting of 200mm compresses distance and lines dont appear to converge at all.
To addjust the angle of view of the lens in Perspective mode, you can either go through the Camera menu and choose Field of View or you can click on the Zoom tool. Then just type the value you want. You can type either a focal length or the angle of view in degrees. If the label in the Measurements box shows "Field of View" and "deg." and you want focal length in millimeters, enter the units, i.e. 85mm and hit Enter. The label with change to "Focal Length" and the value will be shown in millimeters. If you want to go back to Field of View, add "deg" after the value.
You can also choose Two-Point Perspective which will cause the vertical lines to be drawn parallel to each other. After selecting Two-Point Perspective from the Camera menu the cursor will change to the Pan tool (white hand). You may find you need to pan the camera up or down to see the entire model. Note that if you select the Orbit tool the camera will go back to normal Perspective.
Finally, the Parallel Projection mode results in lines drawn so they dont converge at all. this is also referred to as Isometric Projection. There is no reduction in size as distance from the viewer increases. This view is a common "3D" view created by 2D technical drawing methods. There is sometimes value in this sort of drawing especially if you need to be able to scale parts off of the drawing. On the other hand, it can be a bit jarring for those who arent used to looking at this type of drawing. If you are making images for a client to look at, you may find they have a better time reading perspective views instead of Parallel Projection. In any case, you have your choice.
All VideosFast Fix Videos Avoiding Glue Squeeze-Out Build a Custom Drawer for Your Router Bits Build a Hinged Stop Block Build a Shelf Pin Drilling Jig Breadboard Ends Jig Double-sided Router Fence Safer Sliding Dovetail Keys Sharpening Stone Jig Stop Planer Snipe Stowaway Miter Saw Stand Vise Insert Prevents Racking Getting Started in Woodworking Season One Season Two Video Workshop Series Cabriole Leg Carve a Flame Finial Carve a Sheraton Leg Elegant Dining Chair Entertainment Center Garden Bench Hanging Wall Cabinet Mission-Style Bed Monster Workbench Morris Chair One Bookcase, Two Looks Roubo Workbench Small Cabinet Step Stool Tool Cabinet Trestle Table Two Ways to Make a Box Walnut Entertainment Center Guide to Safety Against the Grain (ATG) Game Finishing Applying a Finish Choosing a Finish Surface Preparation Coloring Wood Repairing Finishes Sealing and Priming Joinery Box Joints Breadboard Ends Butt Joints Dovetail Joints Dowels and Biscuits Lap Joints Frame and Panel Miter Joints Mortise and Tenon Joints Rabbet and Dado Joints Specialty Joints Spline Joints Tongue and Groove Joints Furniture Construction Assembly and Glue Up Doors Drawers Furniture Construction Furniture Design Installing Hardware Legs, Feet, and Bases Surface Preparation Trim, Molding, and Edging Upholstery Fundamentals Hand Tool Skills Hand Tool Maintenance Milling Lumber Power Tool Skills Power Tool Maintenance Sharpening Wood Science Specialty Skills Bending Wood Carving Making Shop Tools Shaping Wood Turning Veneering and Inlay Hand Tools Chisels and Carving Tools Clamps Files and Rasps Hammers and Mallets Hand Planes Handsaws Measuring Tools Marking Tools Power Tools Biscuit Joiners Circular Saws Drill-Drivers Grinders Jig Saws Miter Saws Routers Sanders Machinery Bandsaw Accessories Drill-Driver Accessories Gluing and Finishing Supplies Miter Saws Bandsaws Drill Presses Dust Collection Hollow-Chisel Mortisers Jointers Lathes Planers Scroll Saws Tablesaws Industrial Machinery Air Powered Compressors Pneumatic Nailers Spray Guns Accessories Router Accessories Safety Equipment Saw Blades Sharpening Accessories Shop Gear Supports and Bases Tablesaw Accessories Turning Tools and Accessories Woods and Materials Adhesives Fasteners Hardware Other Materials Sheet Goods Solid Wood Lumber Finishes Dyes and Stains Epoxy Lacquers Oils Paints Shellac Varnishes Waxes All Woodworking Plans Accessories Arts and Crafts Asian Style Beds Benches Blanket Chests Bookcases Boxes Built-Ins Cabinets Chairs Chests of Drawers/Dressers Desks Entertainment Centers Outdoor Furniture Period Reproductions Shaker Sideboards Sofa Stool Tables Tools & Storage Turning Workbench Plans Workshop Plans Furniture Gallery Shop Gallery Gallery of Jigs Post Photos of Your Own Work Dream Shop Gallery Magazine Readers Gallery Highlights Shaker Arts and Crafts Tables Workbenches Maloof Inspired Krenov Inspired Shop Gallery Dream Shop Gallery Jigs Gallery Guide to Safety Interactive: Finger-Joint Jig Interactive: Tablesaw Tune-Up Interactive: Ultimate Tablesaw Jig Workshop Layout Workshop Planner Workshop Design Workshop Systems Tool Storage Lumber Storage Workstations Workshop Safety Jigs Clamping Jigs Hand Tool Jigs Measuring and Marking Jigs Power Tool Jigs Push Sticks Router Jigs Sharpening Jigs Tablesaw Jigs Workbench Jigs Blogs NEW: Woodworking TV NEW: The Pro Shop NEW: Hand Work The Editors Mailbox Start Woodworking Free Plans Tool Addicts Design. Click. Build The Woodworking Life GlueTube Furniture Gallery Shop Gallery Gallery of Jigs Share Your Work VideosTechniquesTool GuideMaterialsPlans & ProjectsGalleryWorkshopCommunity KnotsClassifiedsShopsReaders GalleryBlogsLettersProfiles GlueTube Stupefying Engineering in an 18th Century Table comments (12)June 23rd, 2011 in blogs Ed Pirnik, Web Producer 52 users recommend
The marquetry adorning the top of this 18th century table is beautiful, but after over 200 years, its colors have faded significantly.
J. Paul Getty Museum
With the turn of a key, the top and writing surface extend in opposing directions.
J. Paul Getty Museum
A dizzying array of mechanics make this table an engineering marvel.
J. Paul Getty Museum
The drawer beneath the silk-covered writing surface features no pull. Instead, the user must depress a hidden lever beneath it.
J. Paul Getty Museum
Need more storage? A full length drawer opens out from the right side. Of course, it features a beautiful mortised lock set.
J. Paul Getty Museum
The marquetry adorning the top of this 18th century table is beautiful, but after over 200 years, its colors have faded significantly.
Photo: J. Paul Getty Museum Add Comment Print
Nowadays, any enterprising woodworker with a bit of engineering know-how can easily purchase any number of manufactured gears, cams, and ratcheting mechanisms for use in extraordinary pieces of furniture. But back in the 18th century, when this exquisite table was built by a French craftsman, there certainly werent any Woodcraft, Rockler, or McMaster retail stores from which to purchase these sorts of mechanical items, and thats what makes this little table such a marvel of engineering.
Jean-Francois Aubin had privacy in mind when he built this small table for a female French aristocrat. Its chock-full of incredible mechanics thatll make your head spin.
With the turn of a key, the top and writing surface extend in opposing directions, revealing a silk-covered writing surface as well as two hidden wells for the storage of writing paper and other supplies. A small drawer centered beneath the writing surface has no pull with which to open it. Instead, the user depresses a small lever hidden beneath. For even more storage, Aubin incorporated a full length side drawer with a mortised lock set.
Marquetry Worn by Time Interestingly, the colors of the marquetry on this particular table are rather muted--a result of the ravages of time. In much the same way that were not accustomed to seeing the original colors adorning the old ruins of Rome, the artists rendering of what this tables beautifully-adorned top would have looked like some 250 yeears ago is simply stunning.
More on marquetry: be sure to catch our audio slideshow on the construction of a reproduction masterpiece.
Secrets Unfold The J. Paul Getty Museums animation of the inner secrets of this little table is stunning as well, and well worth watching. Its sure to inspire just about anyone who has ever built anything at all!
posted in: blogs, period furniture, french furniture, mechanics Add Comment Print Back to List Comments (12) Ronaldo9 writes: I would expect FWW to do a bit more research, the correct spelling is Jean-François Oeben. He was one of the greatest ébénistes of the XVIII and was also the master of Jean-Henri Riesener (many consider the latest to be the greatest). Their work sure deserve a whole article each. There is one book on Oebens life: http://www.amazon.com/Jean-Fran%C3%A7ois-Oeben-Rosemarie-Stratmann-Dohler/dp/2859173544/ref=ntt_at_ep_dpt_1
Posted: 4:12 am on June 26th philtomlinson writes: FWW should really get out to see Robert Yarger of the Stickman Box Company.
He is a puzzle-box maker extraordinaire.
You can see some samples of his work, including his amazing Pirates Cipher Puzzlechest by going here:
http://www.lhup.edu/jstrayer/charles.htm
Seriously, theres a cover story here. Posted: 5:32 pm on June 25th dixiehighway writes: @geoffm The Amish make a round table that remains round when extended.It is amazing. The pie-shaped pieces unfold, and the table slides out to accept them. Posted: 12:26 pm on June 25th dansanc writes: I take my hat off for Jean-Francois Aubin. What a wonderful piece!!! Are plans available? Posted: 11:38 am on June 25th Norman49 writes: Superbe table. Maitre Aubin certainly was a master artisan. Id love to get a set of plans replicating this table or similar 18c pieces.
Posted: 10:32 am on June 25th Praath writes: I forgot something; Here is the link to the extending round table that I found on the internet about a year ago. Is this the table that was to be seen at Harrods? http://www.youtube.com/watch?v=AWJdal0SYoc Theo
Posted: 6:49 am on June 25th Praath writes: Is this the extending round table you saw at harrods? I think its a marvel Posted: 6:46 am on June 25th PaulC123 writes: I must be being a bit thick (not unusual) where is the link to the animation?
Thanks Posted: 5:32 am on June 25th geoffm writes: ... and speaking of stunning craftsmanship, I am reminded of the Jupe Table, which I saw in Harrods, London. This is a round extending table, which remains round when extended ! Maybe FWW can find some info on this marvellous piece ?
Posted: 3:49 am on June 25th DarrenOates writes: Wow, what an amazing piece. Cant imagine how much this piece must have cost in its day. Agree, amazing craftsmanship. Posted: 3:17 am on June 25th Muscleguy writes: That looks like a clockwork motor doing the work of moving the top and writing surface, activated by the key. You can see the ratchet winding set on the front. Nice and a good use of then available tech. Probably more robust than our modern tendency to use electric motors as well. Posted: 3:12 am on June 25th Rustysea writes: Stunning design stunning craftsmanship - pretty stunning video too - and all done with hand tools. Posted: 2:40 am on June 25th You must be logged in to post comments. Click here to login. Subscribe to RSS Feed
add to: my yahoo | igoogle | my aol ABOUT GLUETUBE
GlueTube is FineWoodworking.coms video blog that features self-produced videos about woodworking submitted by woodworkers around the globe. The videos featured here stream direct from video file-sharing Web sites including YouTube, Howcast, Vimeo, Blip.tv, Brightcove.tv and Google Video.
Learn about our new format!
Archive: Temporarily unavailable. Stay tuned and sorry for the inconvenience.
YOUR COMMENTS
"I would expect FWW to do a bit more research, the correct spelling is Jean-François Oeben. He was..."
Ronaldo9 Stupefying Engineering in an 18th Century Table
"FWW should really get out to see Robert Yarger of the Stickman Box Company. He is a puzzlebox..."
philtomlinson Stupefying Engineering in an 18th Century Table
"Now that I have moved into my geezer years, I really appreciate "a bit too esoteric". Some how I..."
cmtall53 Homemade Slot Mortiser Has all the Right Moves JUST POSTED Stupefying Engineering in an 18th Century Table Woodworking Returns to Public Schools Cheap and Simple Slot Mortiser Plans Homemade Slot Mortiser Has all the Right Moves Video: How to Flatten Wide Boards LINKS WE LIKE The Community Gallery The Editors Mailbox NEW IN THE STORE Dust Control Made Simple Sandor Nagyszalanczy $24.95 more info Add to Cart
Links we Recommend On Startwoodworking.com Easy to Build Plans and Projects Workshop Designs, Tips and Tools Guide to Woodworking Tools Share your Woodworking Projects On FineHomebuilding.com Deck Planning Center Video: How to Tile a Shower Guide to Trim Carpentry Video: Build a Built-in Mudroom Cabinet Video: How to Paint a Room On GreenBuildingAdvisor.com Video: Superinsulating a Home With Rigid Foam Building Science Blog Getting Started in Green Building – A Primer for Beginners Energy Efficiency Blog Green Building News #footer { padding: 20px 0 10px 0; } #footer, #footer a { font-family: Arial, Helvetica, sans-serif; font-size: 11px; color: #959595; text-decoration: none; background-color: #fff; } #footer a:hover { text-decoration: underline; } .footer-content { width: 950px; text-align: left; margin: 0 auto; border-top: 2px dotted #555555; padding-top: 20px; } .footer-content .column { float: left; width: 172px; padding-right: 22px; } .footer-content .last { padding-right: 0px; } .footer-content ul { list-style-type: none; padding: 0; margin: 0 0 18px 0; } .footer-content ul li.heading { margin-bottom: 5px; font-weight: bold; } .footer-content hr { width: 170px; margin-bottom: 20px; } #footer .global-links { display: block; width: 950px; text-align: center; margin: 0 auto; } #footer .global-links, #footer .global-links a { color:#363636; font-size: 12px; padding: 0 2px; } #footer .global-links img.logo { margin-bottom: 8px; } #footer .global-links .byline span { /*display: none;*/ color:#363636; } #footer .global-links .byline span.gb { display: none; } #footer .global-links .taunton-main { display: none; } #footer .global-links p { margin: 12px 0; } #footer .fw, #footer .fw a { color: #BD640D; }#footer .sw, #footer .sw a { color: #175273; } Fine Woodworking Woodworking Plans and Projects Woodworking Videos Woodworking Tools Woodworking Tips and Techniques Woodworking Videos Woodworking Blogs Shops Gallery About Your Safety Woodworking Knots Forum Online Membership Fine Woodworking Magazine Fine Woodworking Magazine Subscription Fine Woodworking Magazine Renewal Fine Woodworking Magazine Gift Subscription Advertiser Marketplace Fine Woodworking Books and DVDs Start Woodworking Fine Homebuilding Homebuilding How-Tos Tool Guide Design and Layout ideas Video Projects and Plans Blogs Projects Photo Gallery Breaktime Forum Online Membership Fine Homebuilding Magazine Fine Homebuilding Magazine Subscription Fine Homebuilding Magazine Renewal Fine Homebuilding Magazine Gift Subscription Advertiser Marketplace Fine HomeBuilding Books and DVDs Green Building Advisor Green Building basics Green Building Product Guide Green Homes Green Building Q&A Green Building Glossary Shop Home Building: Energy Efficiency Fine Cooking Recipes Drink Recipes Guide to Grilling Menu Makers Recipe Makers Cooking How-To Cooking Videos Cookstalk Forum Online Membership Fine Cooking Magazine Fine Cooking Magazine Subscription Fine Cooking Magazine Renewal Fine Cooking Magazine Gift Subscription Fine Cooking Books and DVDs Fine Gardening Plant Guide Garden Design Container Gardening Gardening How To Gardening Videos Blogs on Gardening Gallery Forum Fine Gardening Magazine Fine Gardening Magazine Subscription Fine Gardening Magazine Renewal Fine Gardening Magazine Gift Subscription Advertiser Marketplace Fine Gardening Books and DVDs Vegetable Gardener Grow Vegetables Growing Tomatoes Organic Gardening How to Compost Garden Projects Vegetable Gardening Magazine Threads Sewing How To Sewing Videos Embroidery Patterns Teach Yourself to Sew Sewstylish Forum Threads Magazine Threads Magazine Subscription Threads Magazine Renewal Threads Magazine Gift Subscription Advertiser Marketplace Threads Books and DVDs Craftstylish Crochet Embroidery Jewelry Making Knitting Paper Crafts Sewing Books on Crafts FineWoodworking.comGreenBuildingAdvisor.com is part of the Taunton Home and Garden Network Taunton Home | Books & Videos | Contact Us | Product recall information
Privacy Policy | Copyright Notice | Taunton Guarantee | User Agreement | About Us | Work for Us | Contact Us | Advertise | Press Room | Customer Service | Subscriber Alert










 Furniture Gallery Shop Gallery Gallery of Jigs Post Photos of Your Own Work Dream Shop Gallery Magazine Readers Gallery Highlights Shaker Arts and Crafts Tables Workbenches Maloof Inspired Krenov Inspired Shop Gallery Dream Shop Gallery Jigs Gallery Guide to Safety Interactive: Finger-Joint Jig Interactive: Tablesaw Tune-Up Interactive: Ultimate Tablesaw Jig Workshop Layout Workshop Planner Workshop Design Workshop Systems Tool Storage Lumber Storage Workstations Workshop Safety Jigs Clamping Jigs Hand Tool Jigs Measuring and Marking Jigs Power Tool Jigs Push Sticks Router Jigs Sharpening Jigs Tablesaw Jigs Workbench Jigs Blogs NEW: Woodworking TV NEW: The Pro Shop NEW: Hand Work The Editors Mailbox Start Woodworking Free Plans Tool Addicts Design. Click. Build The Woodworking Life GlueTube Furniture Gallery Shop Gallery Gallery of Jigs Share Your Work
 Stupefying Engineering in an 18th Century Table comments (12)June 23rd, 2011 in blogs
 Ed Pirnik, Web Producer
 52 users recommend


 Add Comment
 Print
 Nowadays, any enterprising woodworker with a bit of engineering know-how can easily purchase any number of manufactured gears, cams, and ratcheting mechanisms for use in extraordinary pieces of furniture. But back in the 18th century, when this exquisite table was built by a French craftsman, there certainly werent any Woodcraft, Rockler, or McMaster retail stores from which to purchase these sorts of mechanical items, and thats what makes this little table such a marvel of engineering.

 Ronaldo9 writes: I would expect FWW to do a bit more research, the correct spelling is Jean-François Oeben. He was one of the greatest ébénistes of the XVIII and was also the master of Jean-Henri Riesener (many consider the latest to be the greatest). Their work sure deserve a whole article each.

 Dust Control Made Simple


